

Want to make a PiStorms robot that uses a PiCamera to recognize icons placed in front of it and reacts differently to each one? This tutorial will teach you how to do just that!
Note: Comments in the Python code are in red. All indentations are made to appear as they should be in the program.
Select the Icons
Before you write the program, you should make a new folder on your Raspberry Pi. This folder will contain your image recognition program, as well as all of the icons you wish for the program to identify.
An example of making a new folder for our icon recognition program:
sudo mkdir /home/pi/PiStorms/programs/09-IconTracker
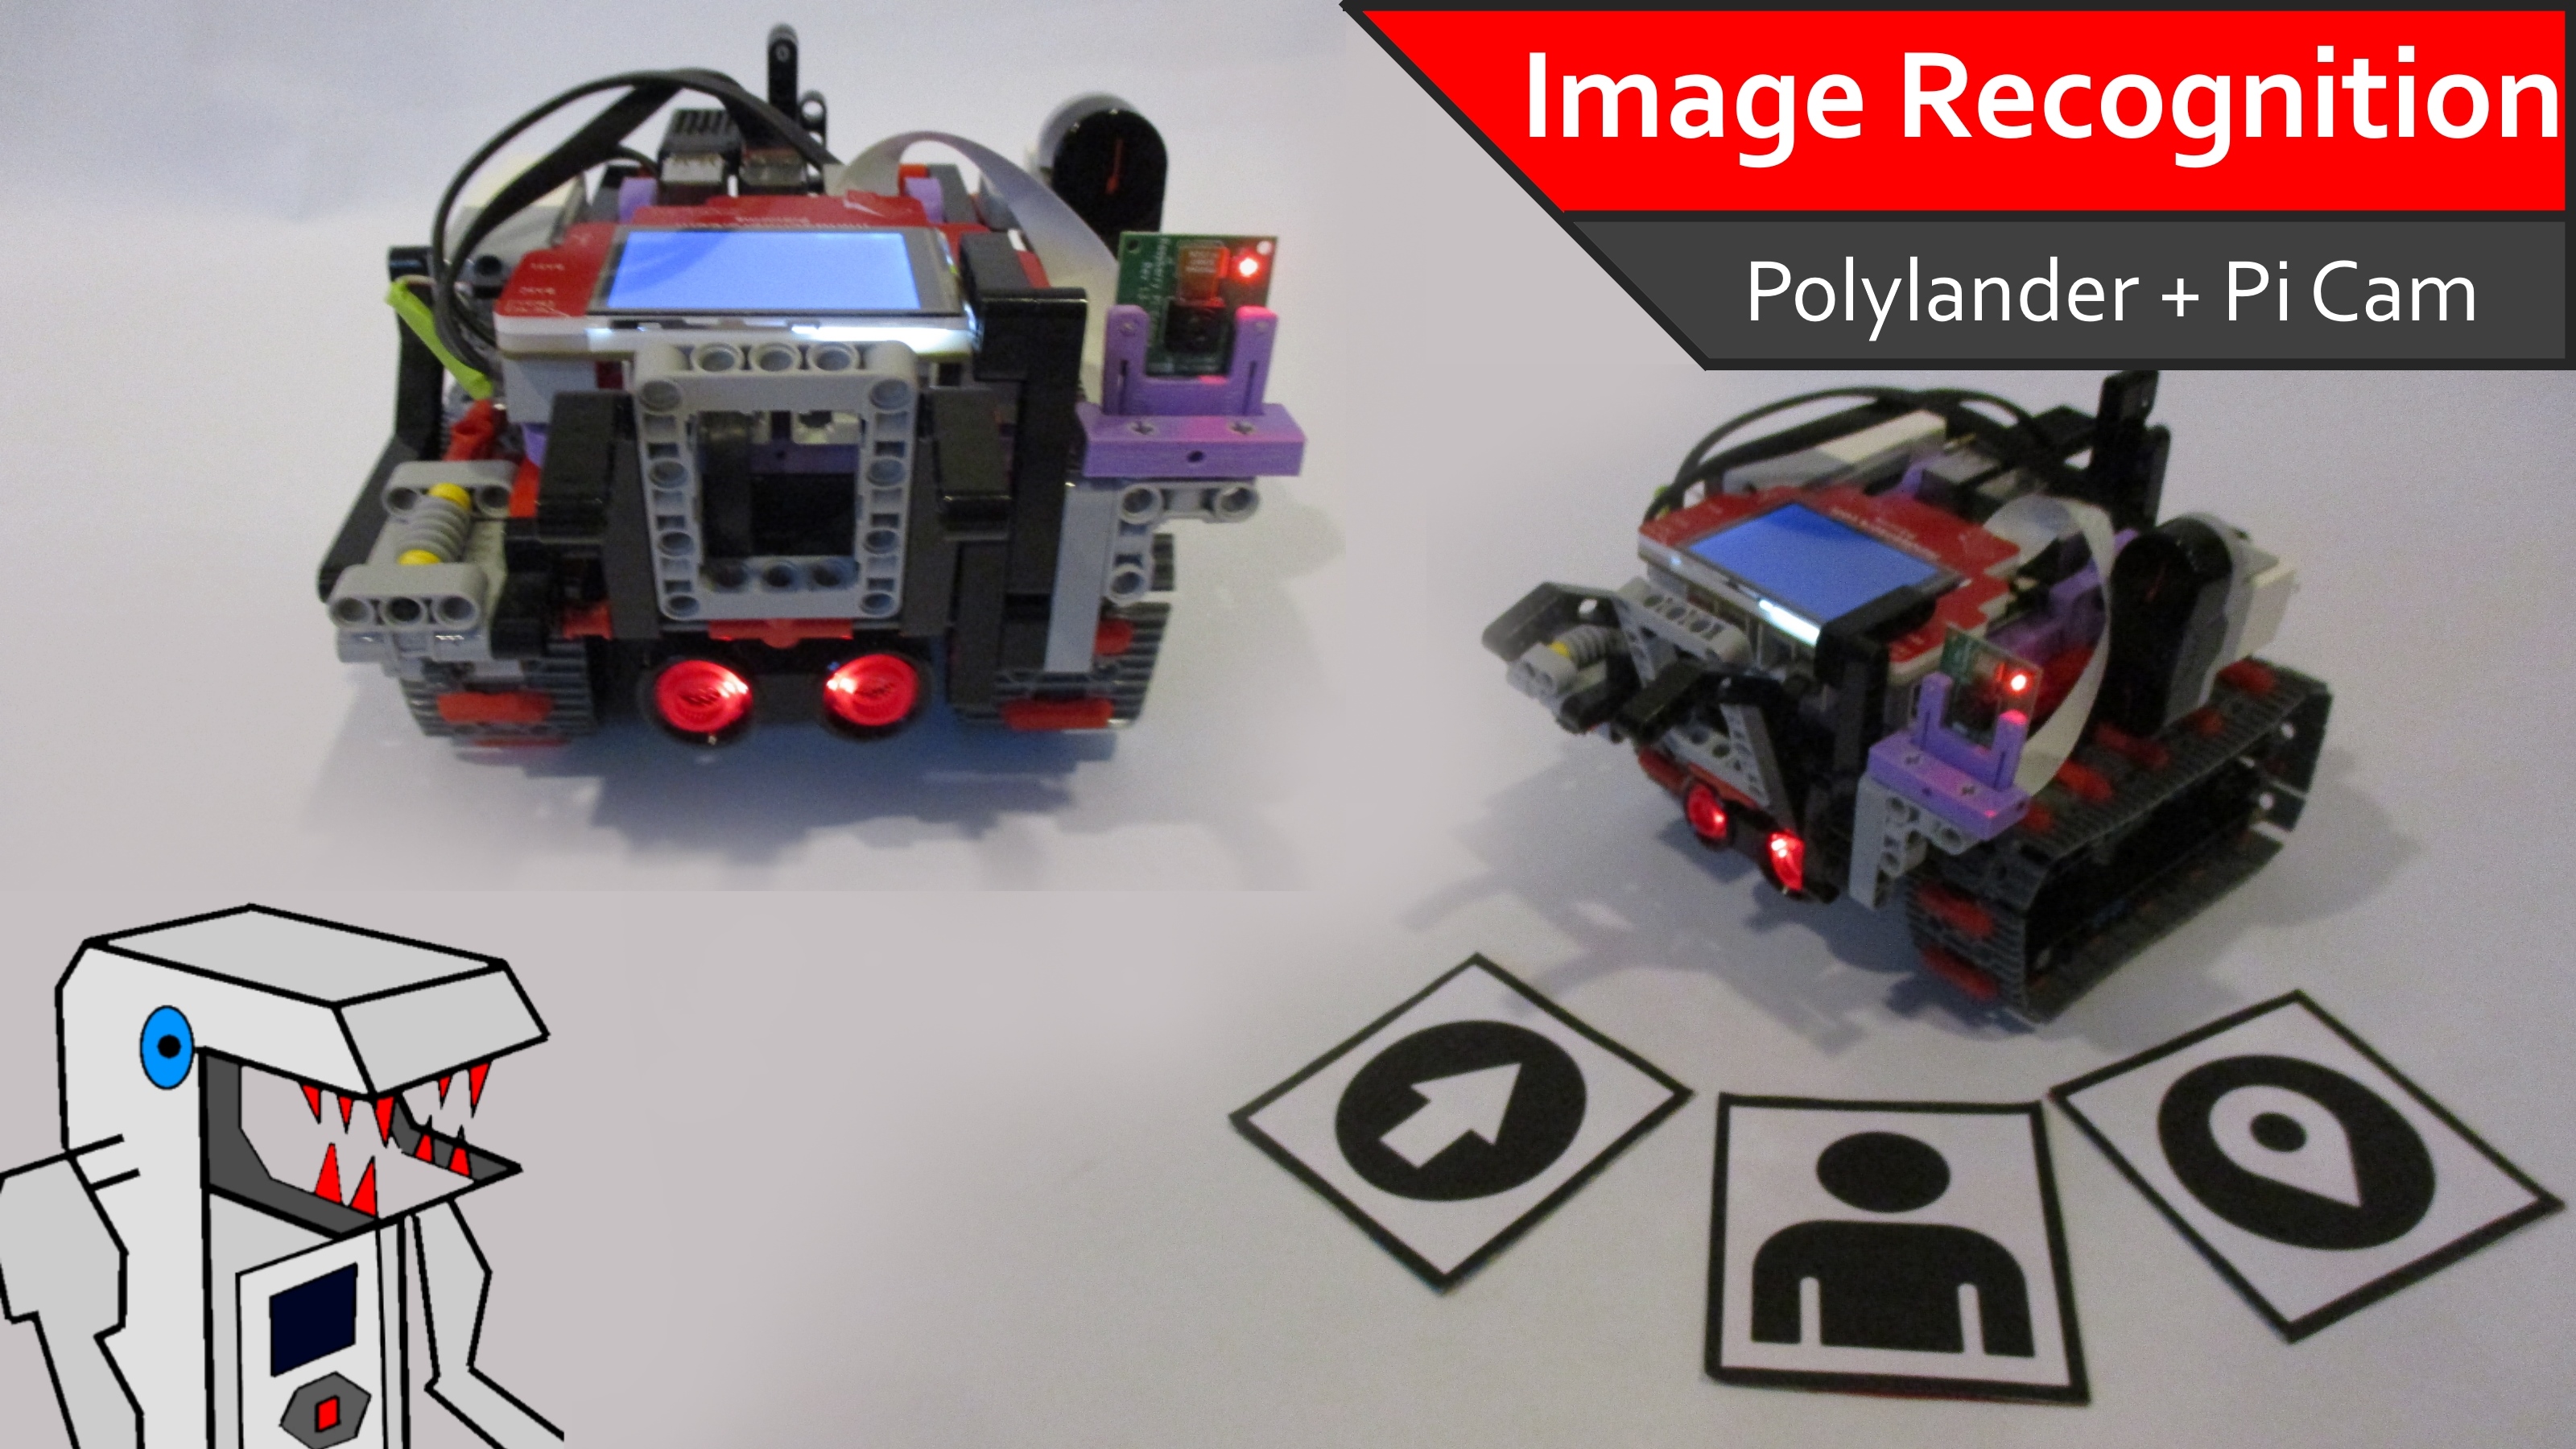
The program we will make today will require .png files and they will need a square frame around them. Below are example icons that you may wish to use. These icons are used by the Polylander’s image recognition programs. See the video here for more information.
Example .png images:
adult.png

circle-arrow-left.png
(You can also use this as “circle-arrow-up.png” and “circle-arrow-right.png” by simply rotating the image)
![]()
map-marker-alt.png

When the program runs, it will check for all of the other .png files that are in that same folder as the program and these images will be the ones that the program is trained to recognize. When it sees an image, the program will return the name of that icon (ex: “adult.png”).
Writing the Icon Recognition Program
After you have the folder set up with the icons you would like to identify, we can now write the Python program that will identify the icon and return its name! Follow the steps below to write the program.
First, we need to import the libraries necessary to run a PiStorms program, as well as the libraries needed for the Pi Camera and some additional setup code:
from picamera.array import PiRGBArray
from picamera import PiCamera
from PiStorms import PiStorms
import cv2
import sys, os
import imutils
import numpy as np
import argparse, time

import inspect
currentdir = os.path.dirname(os.path.abspath(inspect.getfile(inspect.currentframe())))
parentdir = os.path.dirname(currentdir)
sys.path.insert(0,parentdir)

psm = PiStorms()
Second, we’re going to write the code for the “training” function. What this does is checks for .png files that are in the same folder as the program. Then, it takes these images, changes them to grayscale and converts them into an array in order to store them in a form the program can recognize.
class icontracker:
    training = {}
    version = ''
    # Generate the images dictonary and store it in memory
    # Each image is 200x200
    def __init__(self):
       self.training = self.get_training()
       self.version = '1.00'

    def get_training(self):
        path = currentdir
        training = {}
        files = os.listdir(path)
        files_png = [i for i in files if i.endswith('.png')]
        print "files_png: ", files_png
        for file in files_png :
            imR = cv2.imread(currentdir+"/"+file)
            # perform the actual resizing of the image and show it
            imR = self.preprocess(imR)
            training[file] = imR

        return training
Next, we’ll define the function for capturing an image from the Pi Camera.
       # Captures a single image from the camera and returns it in PIL format
    def get_image(self,camera):
        # read is the easiest way to get a full image out of a VideoCapture object.
        retval, ig = camera.read()
        return im
Now, we can start moving into our image recognition code. Let’s define a few more functions:
    ##############################################################################
  # Image Matching
  ##############################################################################

    def preprocess(self,img):
        gray = cv2.cvtColor(img,cv2.COLOR_BGR2GRAY)
        blur = cv2.GaussianBlur(gray,(5,5),5 )
        thresh = cv2.adaptiveThreshold(blur,255,1,1,11,1)
        return thresh


    def imgdiff(self,img1,img2):
        img1 = cv2.GaussianBlur(img1,(5,5),5)
        img2 = cv2.GaussianBlur(img2,(5,5),5)
        diff = cv2.absdiff(img1,img2)
        diff = cv2.GaussianBlur(diff,(5,5),5)
        flag, diff = cv2.threshold(diff, 200, 255, cv2.THRESH_BINARY)
        return np.sum(diff)

    def find_closest_card(self,training,img):
        features = preprocess(img)
        return sorted(training.values(), key=lambda x:imgdiff(x[1],features))[0][0]
In order to know if we have found our icon, the robot needs to see the square border around the image. This function will see if the icon in front of it has a square border.
    def findSquare( self,frame ):
              gray = cv2.cvtColor(image, cv2.COLOR_BGR2GRAY)
        blurred = cv2.GaussianBlur(gray, (7, 7), 0)
        edged = cv2.Canny(blurred, 60, 60)
        # find contours in the edge map
        (cnts, _) = cv2.findContours(edged.copy(), cv2.RETR_EXTERNAL, cv2.CHAIN_APPROX_SIMPLE)
        # loop over our contours to find hexagon
        cnts = sorted(cnts, key = cv2.contourArea, reverse = True)[:50]
        screenCnt = None
        for c in cnts:
            # approximate the contour
            peri = cv2.arcLength(c, True)
            approx = cv2.approxPolyDP(c, 0.004 * peri, True)
            # if our approximated contour has four points, then
            # we can assume that we have found our square

            if len(approx) >= 4:
                screenCnt = approx
                x,y,w,h = cv2.boundingRect(c)
                cv2.drawContours(image, [approx], -1, (0, 0, 255), 1)
                #create the mask and remove rest of the background
                mask = np.zeros(image.shape[:2], dtype = "uint8")
                cv2.drawContours(mask, [screenCnt], -1, 255, -1)
                masked = cv2.bitwise_and(image, image, mask = mask)
                #crop the masked image to to be compared to referance image
                cropped = masked[y:y+h,x:x+w]
                #scale the image so it is fixed size as referance image
                cropped = cv2.resize(cropped, (200,200), interpolation =cv2.INTER_AREA)

                return cropped
Just two more functions to go. These last two are used for locating and identifying the icon:
    def locate_target( self,frame ):
               #find the square logo image from our image
        self.target = self.preprocess( self.findSquare(frame))
        return self.target

    def identify_target( self,frame ):
        results = {}
        for file in self.training :
            results[file] = self.imgdiff(self.locate_target(frame),self.training[file])

        x = min (((e) for e in results if e), key=results.get)
        return x
Now it’s time to put these functions together in a cohesive program so we can identify the icons! First, we need to initialize the Pi Camera, setting up resolution and frame rate.
if __name__ == '__main__':

    icon = icontracker()
    print icon.training
    print icon.version
    # Now we can initialize the camera capture object with the cv2.VideoCapture class.
    # All it needs is the index to a camera port.
    camera = PiCamera()
    camera.resolution = (320, 240)
    rawCapture = PiRGBArray(camera, size=(320, 240))
    camera.framerate = 30
We will now “ramp” the camera, which will throw away frames as the camera is stating up.
    # Ramp the camera - these frames will be discarded and are only used to allow v4l2
    # to adjust light levels, if necessary
    '''
    for i in xrange(ramp_frames):
        temp = icon.get_image(camera)
    '''
    i =0
    lasttime = time.time()
Processing the image captured by the camera so we can compare it to the images from “training:”
    for frame in camera.capture_continuous(rawCapture, format="bgr", use_video_port=True):
        # grab the raw NumPy array representing the image, then initialize the timestamp
        # and occupied/unoccupied text

        i = i+1
        image = frame.array
        gray = cv2.cvtColor(image, cv2.COLOR_BGR2GRAY)
        print I

        '''
        #find the square logo image from our image
        target = icn.preprocess( icn.findSquare(image))
        cv2.imshow('target',target)
        cv2.waitKey(0)
        print 'target', target.shape

        results = {}
        for file in icn.training :
            results[file] = icn.imgdiff(target,icn.training[file])

        print min(results, key=results.get)
        '''
Finally, for the last part of the image recognition program, we will store the name of the image the robot has identified in a variable called “img.” The robot will print the name of the image to the PiStorms screen (ex: “adult.png”), as well as a time stamp. Now, we can program cases for the robot to react to the identified image.
              img = icon.identify_target(image)
        print "identified: " , img
        psm.screen.termPrintAt(7, "count: " + str(i))
        psm.screen.termPrintAt(8, "identified: " + str(img))
        print 1000*(time.time() - lasttime)
        lasttime = time.time()
        # clear the stream in preparation for the next frame
        rawCapture.truncate(0)
Programming the Robot’s Reaction to the Icons
Now, we can program our robot to react to whichever icon it has identified.
Recall in the last step, that we ended the image recognition portion of the program by storing the name of the identified image in a variable called “img.” Now, we are going to have the robot read this variable and program in reactions based on whichever image is identified.
To do this, we are going to have an if statement for each image we want the robot to react to in that program, followed by the series of commands we want the robot to execute after it has seen the icon. It should look something like this (be sure to replace “image_name.png” with the actual image name):
        if (img == “image_name.png”):
        # do something
Here is an example of how to do this, taken directly from the Polylander’s “PolylanderIconArrow.py” program. This program identifies the arrow icons. Once an icon is identified, the Polylander displays the identified icon on the screen and steers in the direction the arrow tells it to drive:
              if (img == "circle-arrow-left.png"):
                  # Turn left:
                  psm.screen.fillBmp(30, 0, 240, 240, path = currentdir+'/'+"circle-arrow-left.png")
                  psm.BAM1.setSpeed(100)
                  psm.BAM2.setSpeed(30)

              if (img == "circle-arrow-right.png"):
                  # Turn right:
                  psm.screen.fillBmp(30, 0, 240, 240, path = currentdir+'/'+"circle-arrow-right.png")
                  psm.BAM1.setSpeed(30)
                  psm.BAM2.setSpeed(100)

        if (img == "circle-arrow-up.png"):
                  # Drive forward:
                  psm.screen.fillBmp(30, 0, 240, 240, path = currentdir+'/'+"circle-arrow-up.png")
                  psm.BAM1.setSpeed(75)
                  psm.BAM2.setSpeed(75)
An important thing to note is that unless you program it to, the camera will not continue to capture and identify new images while in an if statement, so try to keep them short.
It may be wise to choose to make a case for when the robot sees nothing (which is img = “none.png”). This will be the default case, if no icon is detected. Below is an example from the Polylander program, which stops the robot and clears the screen if no image is seen:
         if (img == "none.png"):
             # If there is no image found, halt:
             psm.screen.clearScreen()
             psm.BAM1.brake()
             psm.BAM2.brake()
Finally, this last piece of code is very important. This piece of code will quit the program if the “GO” button is pressed, providing a way to exit the program and return to the PiStorms browser. This piece of code should go just after all of your other image “if” statements.
        # Exiting the program:
        if (psm.isKeyPressed()):
                  psm.BBM1.brake()
                  psm.BAM1.brake()
          psm.BAM2.brake()
          psm.screen.clearScreen()
          psm.screen.termPrintAt(9, "Exiting to menu")
          time.sleep(0.5)
          quit()